Jar Testing Explained: How Operators Find the Optimal Coagulant Dose
Walk into any surface-water treatment plant and you'll find a jar test apparatus somewhere, a row of six beakers under paddle stirrers, sitting on a shelf next to the chemical feed room. The jar test is the single most useful bench-scale procedure a water operator runs. It tells you the right coagulant dose, the right coagulant, the right pH, and whether adding a polymer helps. Every exam from Class C up tests jar-test concepts. And every operator who's been on the wrong side of a settled turbidity spike has stood in front of one trying to figure out what changed.
Key takeaways
- A jar test is a six-beaker bench-scale rehearsal of the full-scale coagulation/flocculation process. You add increasing doses of coagulant across the six jars, mix fast, mix slow, settle, and read the supernatant.
- The optimal dose is the lowest dose that produces clear supernatant, not the dose that produces the biggest floc.
- Mixing energy matters: rapid mix at 100+ rpm for 1 minute to disperse coagulant, slow mix at 20–40 rpm for 15–20 minutes to grow floc, then 30 minutes of quiet settling.
- Read turbidity or color in the supernatant. Floc size and settling speed are observations, not the answer.
- A jar test only predicts full-scale performance if your raw water hasn't changed since you ran it. Re-run it whenever turbidity, temperature, pH, or alkalinity shifts.
- Practice questions from the coagulation/flocculation test and run the math with the chemical dosage calculator.
Why we run jar tests
Coagulation chemistry isn't predictable from the chemical bottle alone. The dose that works for one raw water won't work for another. A surface plant pulling from a reservoir in August is fighting algae, warm water, and high pH. The same plant in March is fighting cold water, snowmelt turbidity, and tannins from leaf litter. The coagulant dose for those two conditions can differ by a factor of three, and getting it wrong wastes chemical money and pushes settled-water turbidity out of spec.
Running a jar test is cheaper than guessing. The procedure costs an hour of operator time, six 1-liter beakers of raw water, a strip of dose math, and a turbidimeter reading. The payoff is a defensible dose for the next 8–24 hours of operation, plus an answer to whatever the question is, "should I switch from alum to ferric?", "is my polymer doing anything?", "do I need to adjust pH?".
The procedure, step by step
A standard jar test setup has six 1-liter (or 2-liter) square or round beakers under matched paddle stirrers driven by a single shared shaft. The paddles spin together at the same rpm. You fill all six beakers from the same raw water sample, then dose them with increasing amounts of coagulant.
1. Sample. Collect at least 8 liters of raw water, enough to fill six beakers plus a backup. Measure raw water turbidity, pH, alkalinity, and temperature first.
2. Dose. Decide on a dose range. A reasonable starting range for alum on Class A surface water might be 10, 20, 30, 40, 50, and 60 mg/L. If you're working from a previous test, bracket your last optimum tightly: 25, 30, 35, 40, 45, 50 mg/L. Add the coagulant to each beaker.
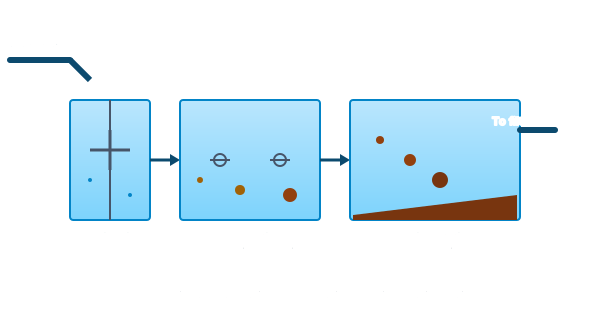
3. Rapid mix. Spin paddles at 100 rpm for 1 minute. This disperses the coagulant and starts charge neutralization. In the full-scale plant, this is your flash mix or static mixer.
4. Slow mix. Drop paddles to 20–40 rpm for 15–20 minutes. This is flocculation: colloidal particles collide, stick, and grow into settleable floc. In the full-scale plant, this is your flocculation basins. Watch the beakers during this stage. You'll see floc form and grow at different rates in each.
5. Settle. Stop the paddles. Let beakers sit undisturbed for 30 minutes. Watch the floc settle. In the full-scale plant, this is your sedimentation basin.
6. Read. Withdraw a sample from each beaker about 1 inch below the surface, that's your supernatant, the cleaned water that would have gone to the filters. Measure turbidity (or color, or TOC, depending on what you're optimizing for).
The optimum dose is the one with the lowest supernatant turbidity. Not the prettiest floc. Not the fastest settler. The clearest supernatant.
What each observation tells you
Operators new to jar tests sometimes fall for floc that looks impressive, big chunks falling like snow. Big floc doesn't necessarily mean clean supernatant. The exam writers love this trap. The answer is always the dose that gives clearest supernatant turbidity.
That said, the floc itself tells you something. Tiny floc that won't settle ("pinpoint floc") usually means underdose, not enough coagulant to fully neutralize the colloid charge. Big mushy floc that won't compact often means overdose, you've gone past charge neutralization and restabilized the particles with excess coagulant. The sweet spot is a tight, dense floc that settles within the first 5–10 minutes and leaves a clear supernatant.
If two adjacent doses look identical in supernatant turbidity, pick the lower one. Coagulant costs money, and overdose carries downstream consequences: depressed pH, higher sludge volume, and more aluminum or iron carryover.
A worked example
You're running jar tests on a 5 NTU raw water at pH 7.8 with 80 mg/L alkalinity. You dose alum at six levels and measure supernatant turbidity after 30 minutes of settling:
| Dose (mg/L) | Supernatant turbidity (NTU) | Floc observation |
|---|---|---|
| 10 | 3.2 | Pinpoint floc, mostly suspended |
| 20 | 1.4 | Small floc, slow settling |
| 30 | 0.5 | Good floc, settles in 8 min |
| 40 | 0.4 | Dense floc, settles in 5 min |
| 50 | 0.5 | Larger floc, slower compaction |
| 60 | 0.7 | Big mushy floc, restabilizing |
The optimum dose is 40 mg/L. Doses of 30 and 50 are very close, but 40 mg/L gives the clearest supernatant. Above 50 mg/L you're seeing restabilization, adding more alum is making the water worse. This is the curve every coagulation textbook draws, and it's the curve the exam expects you to recognize.
pH and the jar test
Alum and ferric coagulants only work in narrow pH windows. Alum's sweet spot is 5.5–7.5; ferric chloride works from 4.5–9. If your raw-water pH is outside the active range, high pH lake water in summer, for instance: you can run six jar tests at six different doses and never find a good dose, because pH is the problem.
The right jar test for a pH-limited water is a two-variable test. Pick a starting dose, then run six beakers at varying pH (using a small lime or acid addition) at that one dose. Find the pH that gives the cleanest supernatant, then redose at that pH. Many state exams ask conceptually about pH-adjusted jar tests, and any Class B or A exam will expect you to recognize the optimum coagulation pH range for alum vs. ferric vs. polyaluminum chloride.
For more on which coagulant fits which water, see the companion guide on coagulants compared: alum, ferric, and polymers.
Common operator mistakes
Picking biggest floc instead of clearest supernatant. The dose with the prettiest floc is sometimes already past optimum. Read turbidity, not optics.
Not matching mixing energy to the full-scale plant. A 100-rpm rapid mix and 30-rpm slow mix is the textbook standard, but if your full-scale plant runs different G-values, your jar test should approximate them. Mismatched mixing produces a dose recommendation that doesn't translate.
Sampling from the bottom instead of the supernatant. The whole point is to read the cleaned water that would have gone to the filters. Sample about 1 inch below the surface, not from the floc layer.
Reading too soon. Thirty minutes of settling is the minimum. Some operators cut it short and pick a dose that looked best at 5 minutes, and then their full-scale settling basin doesn't perform the same way.
Forgetting to retest when conditions change. A jar test is a snapshot. Cold-weather raw water needs more coagulant than warm. Algal blooms change the colloid load. After every significant change in raw water, retest.
Treating the jar test as a one-time event. The best plants run jar tests weekly, or daily during seasonal transitions. The result of yesterday's jar test isn't the answer to today's coagulation problem.
How jar test concepts show up on exams
Class C exams ask conceptually: what is the purpose of a jar test, what's the difference between rapid mix and slow mix, what does "optimum dose" mean. Class B and Class A push into the chemistry: pH ranges for different coagulants, what restabilization looks like, how to design a two-variable test, why overdose is worse than slight underdose.
Common right-answer patterns the exam expects:
- The optimum dose is the dose with the lowest supernatant turbidity.
- Rapid mix disperses the coagulant; slow mix grows the floc.
- Bigger floc isn't always better, restabilization can produce mushy, slow-settling floc above optimum.
- Cold water and low alkalinity make coagulation harder and may require higher dose, polymer addition, or pH adjustment.
- Alum performs best at pH 5.5–7.5; ferric chloride at 4.5–9; PACl tolerates the widest pH range.
If you can keep those five points straight, you'll get the jar-test questions on any exam in the country.
Quick reference
- Apparatus: 6 beakers, matched paddles, single shared drive
- Rapid mix: 100 rpm for 1 minute
- Slow mix: 20–40 rpm for 15–20 minutes
- Settle: 30 minutes, undisturbed
- Read: supernatant turbidity, 1 inch below surface
- Optimum: lowest dose with lowest turbidity (not biggest floc)
- pH ranges: alum 5.5–7.5, ferric 4.5–9, PACl 6–9 broadly
Practice and next steps
The fastest way to lock in jar-test concepts is to run a few. If you don't have access to a jar test apparatus, the practice tests on this site cover every angle the exam asks about.
- Free coagulation/flocculation practice test: 50 questions on jar testing, coagulants, mixing, and floc behavior.
- Free filtration practice test: what happens after the floc reaches the filters.
- Coagulants compared: alum, ferric, and polymers: companion guide on picking the right coagulant.
- Filter loading rates and backwashing: operator math for what comes after coagulation.
- Chemical dosage calculator: work out full-scale doses in mg/L, lb/day, or gallons/day of solution.
The jar test is one of the few procedures in water treatment where bench science and operator judgment meet on equal footing. The math is simple; the read is everything.